Showing posts with label Food. Show all posts
Showing posts with label Food. Show all posts
Friday, June 15, 2012
We won a Global knife!
The results for Eat for the Earth were announced today, and we're one of the lucky winners! We didn't win the big prize of a Global knife block, but we did win one of the knives. Woo-hoo!


Tuesday, June 12, 2012
A surprisingly disappointing dinner
We went out to dinner at the Attic last night. It was my 3rd visit there, and the previous 2 times the food has been absolutely phenomenal. My expectations were obviously high last night - and I was actually quite disappointed.
Their new winter menu was launched only last week, so I was quite curious to see what they came up with. Some old favourites are still there - the chilli salt squid starter, the crab & fettucine main meal and so on. But we each had only choices that we haven't tried before.
My starter was a slow poached duck egg served over tenderstem broccoli with a herb aioli. Lovely stuff, but the egg was poached firm, instead of soft as I expected, and there were only three tiny pieces of broccoli on the plate. It was supposed to be served with toasted brioche, but instead there were a few crumbs on the plate, the biggest roughly the size of my pinkie nail. My husband chose the winter mushroom salad with gorgonzola, red onion and pine nuts, but there was no sign of any gorgonzola or red onion in the salad. The mushrooms were well cooked but when you order a meal with gorgonzola, you expect to receive it!
My main was the pork belly, which was mostly lovely if a little less tender than I expected. But it was served on a little square potato cake that tasted like the potatoes had been frozen - you know that almost floury texture that potato gets when it is thawed? It tasted like that. Plus the sauce that was served with the pork was entirely savoury, and usually pork is served with at least a touch of sweetness. So that was unusual. My husband had the duck 2 ways, and that was really well cooked, so no complaints.
Then we waited about 20 minutes to be able to attract our waitress' attention, and once she finally took our order for dessert it was almost 40 minutes before we received it. We queried it with our waitress after about 30 minutes and she had to ask again what we had ordered, and then said that it's "definitely coming". I had the salted caramel pot, very nice but the flakes of salt were huge so the taste alternated between too-salty and not-salty-at-all, a little disappointing. It was also supposed to be served with a sea salt tuille, but instead again I received a 1cm by 1 cm little square of baked dough, flavourless and adding absolutely nothing to the dessert. My husband's dessert on the other hand was HUGE, a piece of pear and almond tart big enough to serve 3 people, and the tart base was really hard and overbaked.
Then once again it took forever for our waitress to visit our table so we could request the bill. We told her that we were in a hurry to get home and relieve our baby sitter - the long delay on the dessert meant that this was about 30 minutes later than we expected. And despite us commenting on this urgency, she was still standing around doing nothing for about 10 minutes (I could see her from my seat).
When the bill finally came we were charged corkage on 2 bottles of wine even though we only had one, which caused more delays.
So yeah - all in all a really disappointing evening. Given all the other great restaurants in the area I honestly don't know if we'll be back.
Their new winter menu was launched only last week, so I was quite curious to see what they came up with. Some old favourites are still there - the chilli salt squid starter, the crab & fettucine main meal and so on. But we each had only choices that we haven't tried before.
My starter was a slow poached duck egg served over tenderstem broccoli with a herb aioli. Lovely stuff, but the egg was poached firm, instead of soft as I expected, and there were only three tiny pieces of broccoli on the plate. It was supposed to be served with toasted brioche, but instead there were a few crumbs on the plate, the biggest roughly the size of my pinkie nail. My husband chose the winter mushroom salad with gorgonzola, red onion and pine nuts, but there was no sign of any gorgonzola or red onion in the salad. The mushrooms were well cooked but when you order a meal with gorgonzola, you expect to receive it!
My main was the pork belly, which was mostly lovely if a little less tender than I expected. But it was served on a little square potato cake that tasted like the potatoes had been frozen - you know that almost floury texture that potato gets when it is thawed? It tasted like that. Plus the sauce that was served with the pork was entirely savoury, and usually pork is served with at least a touch of sweetness. So that was unusual. My husband had the duck 2 ways, and that was really well cooked, so no complaints.
Then we waited about 20 minutes to be able to attract our waitress' attention, and once she finally took our order for dessert it was almost 40 minutes before we received it. We queried it with our waitress after about 30 minutes and she had to ask again what we had ordered, and then said that it's "definitely coming". I had the salted caramel pot, very nice but the flakes of salt were huge so the taste alternated between too-salty and not-salty-at-all, a little disappointing. It was also supposed to be served with a sea salt tuille, but instead again I received a 1cm by 1 cm little square of baked dough, flavourless and adding absolutely nothing to the dessert. My husband's dessert on the other hand was HUGE, a piece of pear and almond tart big enough to serve 3 people, and the tart base was really hard and overbaked.
Then once again it took forever for our waitress to visit our table so we could request the bill. We told her that we were in a hurry to get home and relieve our baby sitter - the long delay on the dessert meant that this was about 30 minutes later than we expected. And despite us commenting on this urgency, she was still standing around doing nothing for about 10 minutes (I could see her from my seat).
When the bill finally came we were charged corkage on 2 bottles of wine even though we only had one, which caused more delays.
So yeah - all in all a really disappointing evening. Given all the other great restaurants in the area I honestly don't know if we'll be back.
Sunday, June 10, 2012
Eat for the Earth - the picture gallery
So we hosted our Eat for the Earth dinner on Tuesday and it was awesome! I have some (bad!) pictures of the event, so here goes:
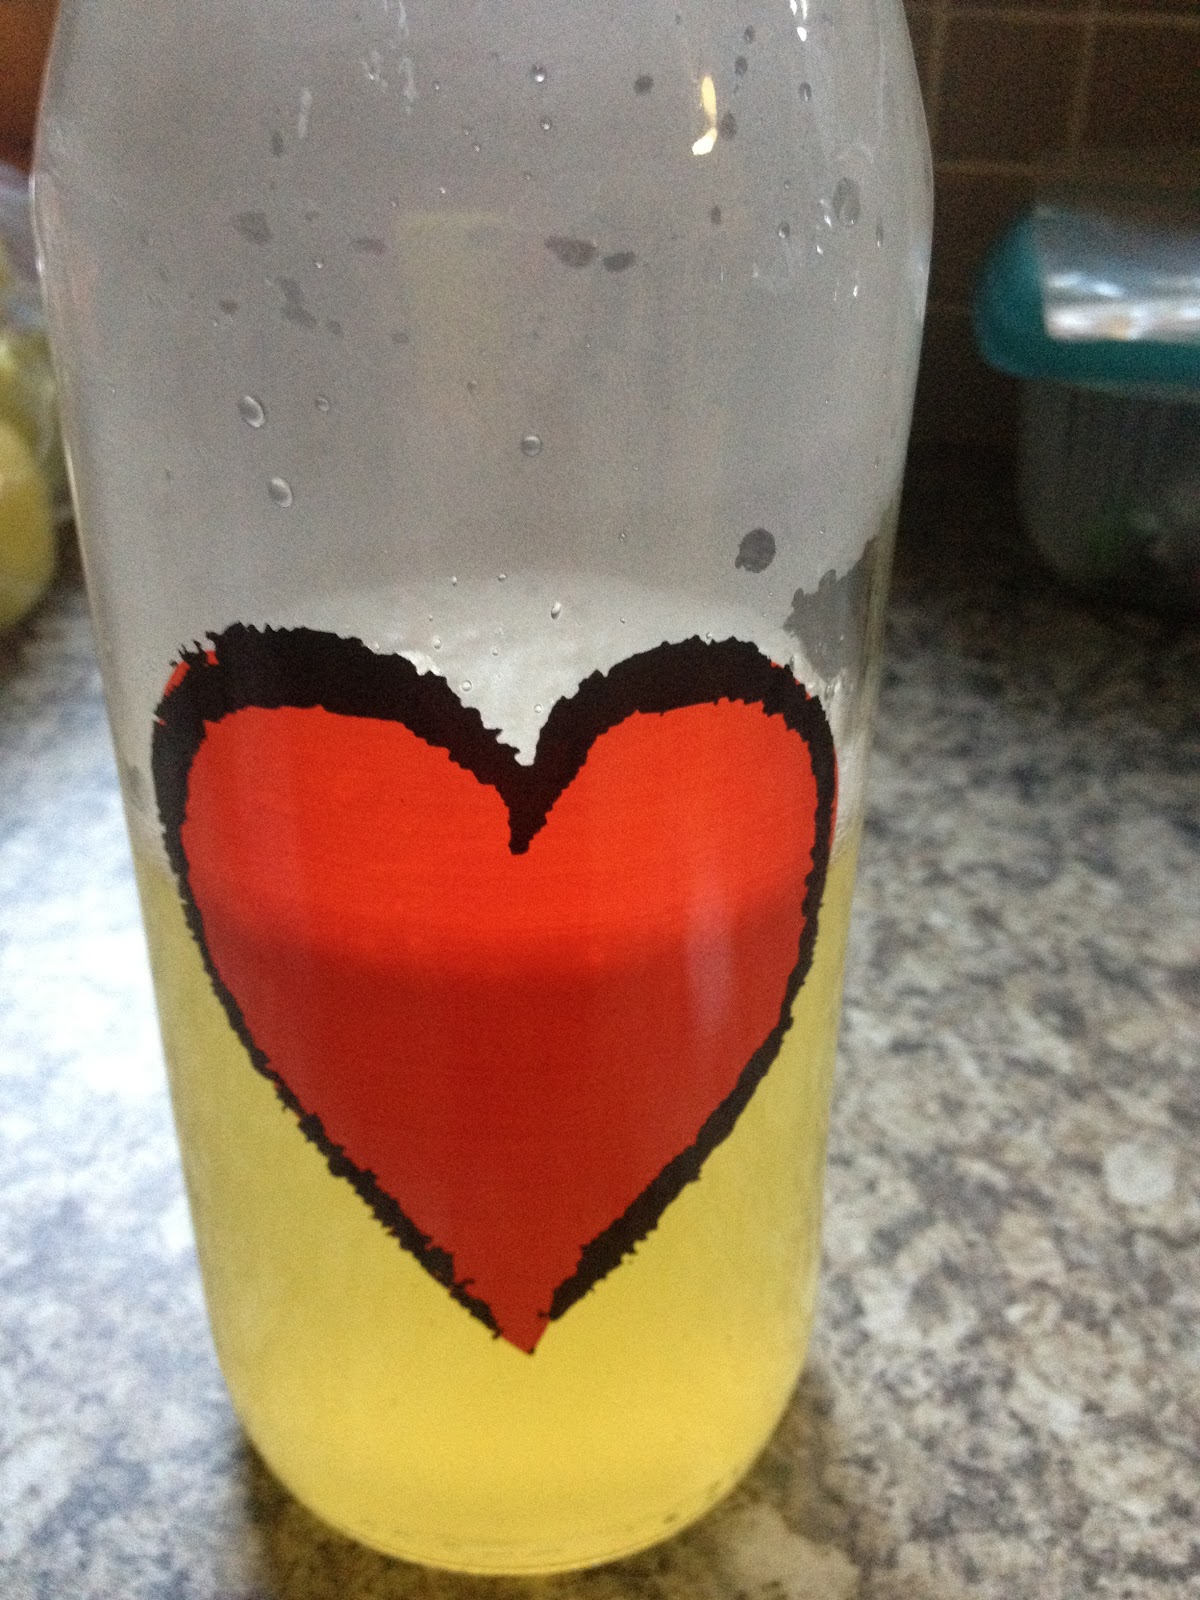
The semi-organic lemonade, home-made. Semi-organic because I couldn't find local organic sugar so I sticked to the regular stuff:

Starters was a home-made roasted tomato and red pepper soup:
Fresh organic tomatoes from Woolworths slow-roasted in the oven for about 6 hours:


Until it looks like this:


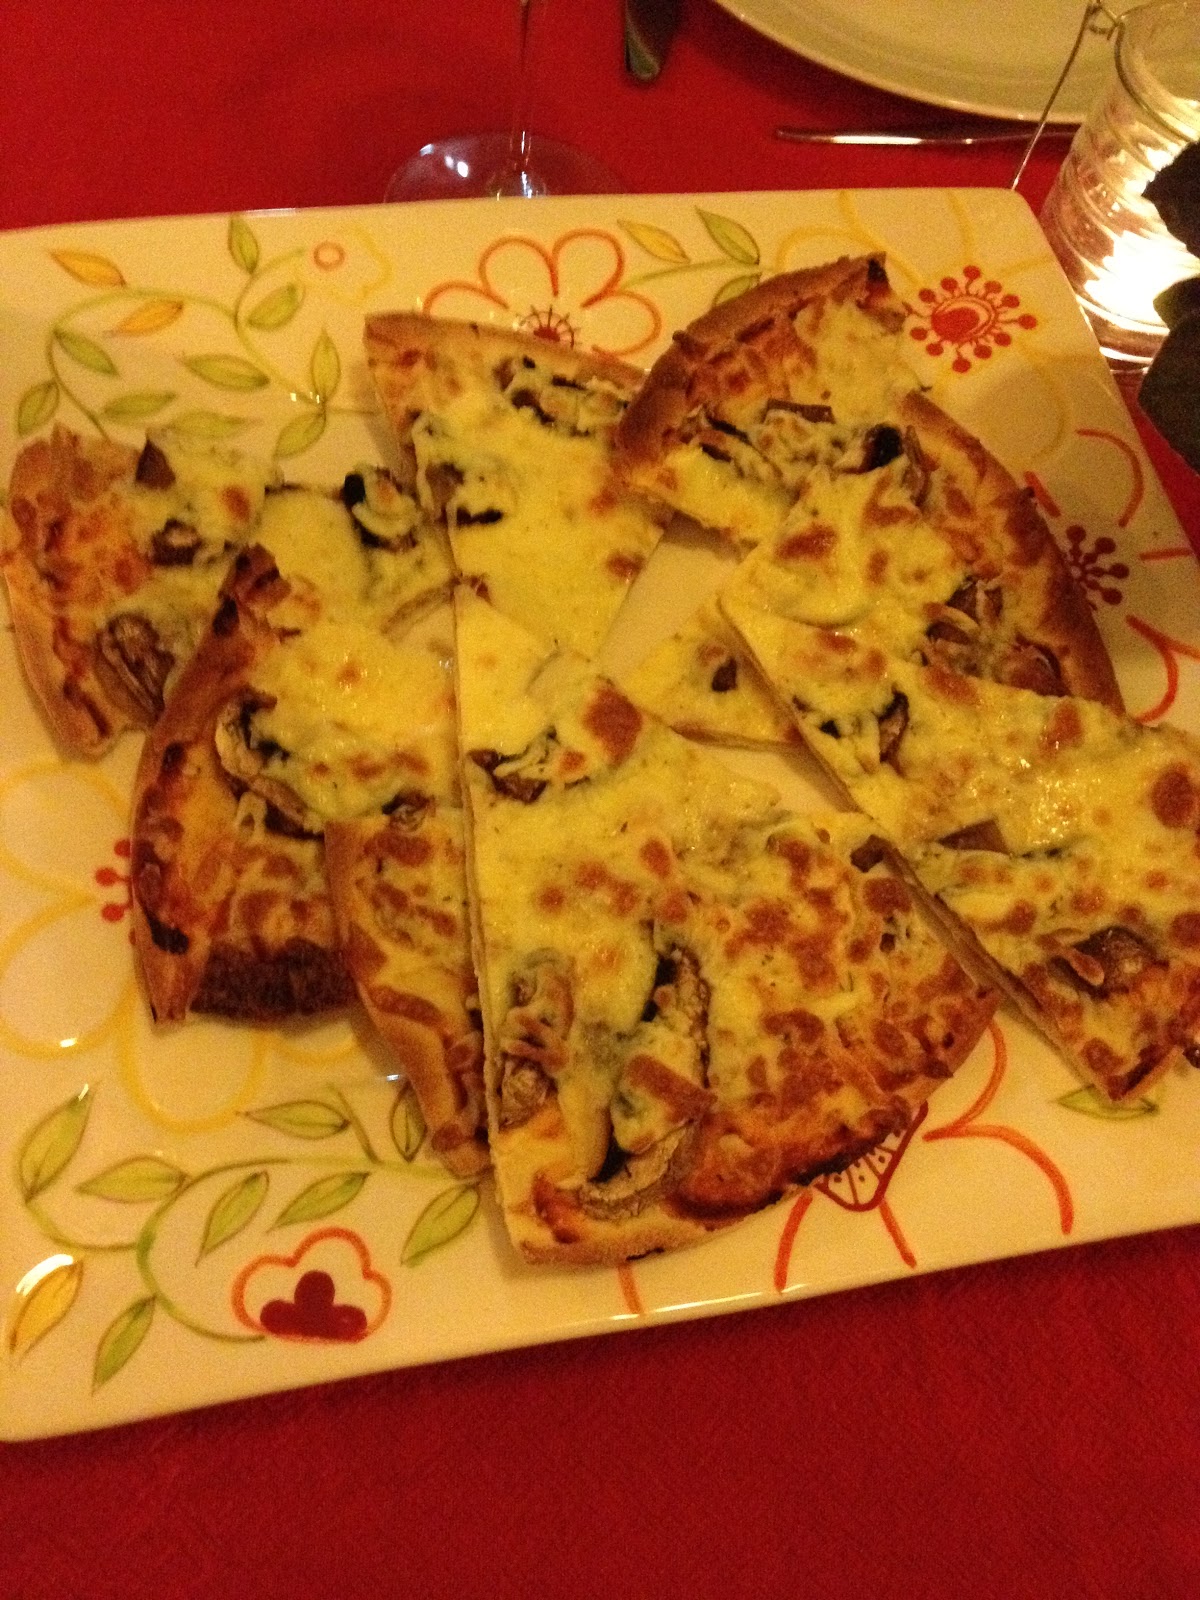
Then we had a pizza course, home-made bases made from organic flour. One had brown mushrooms and the other mozzarella balls and baby tomatoes (all from the Bryanston organic market). The tomato one had fresh basil from the garden added just before serving.


This was then followed by the main course - butternut canneloni topped with a spinach and ricotta mixture, organic passata and an organic cheese sauce (with organic butter, flour, milk and cheese!) Baked in the oven and served with salad from the garden.


And to end the evening, an Italian apple cake with all organic ingredients except the sugar and baking powder:


Oh, and for the kids I made cupcakes, topped with green icing and let them decorate their own "gardens". They loved it!


All in all the evening was a fantastic success. A few more pictures:
Hanno in the very messy kitchen, filling the butternut canneloni

My friend Dee grating some pecorino cheese from the Bryanston market for the cheese sauce:

Everyone had an all-natural meal, baby included:

And my geek friend Simon wearing my dune-inspired apron, after lighting the fire. The wine was Laibach's Ladybug 2009, a beautiful (and award-winning) organic wine.

The table setting. We used potted African violets as decorations, and they doubled as thank-you gifts for the guests.

And there you have it! The results for the winners should be out this week, and we're holding thumbs that we did enough to qualify for one of the prizes. But even if we didn't the food was phenomenal and the evening was awesome, and it's all for a good cause.
Sunday, May 27, 2012
Preparing for Eat for the Earth
I've neglected this blog for most of this year. I really want to get back into it, so let me tell you about the Eat for the Earth plans that we're making.
Eat for the Earth was first run last year, when we also took part. The basic concept is pretty simple: Invite some friends over on World Environment Day, get everyone to donate money, it goes to Soil for Life.
Yuppiechef sponsors some prizes for good entries, and we'd really like to be a serious contender this year. Last year we kept it fairly relaxed, hosted a Moroccan lunch which was awesome but we didn't really try to be as environmentally friendly as possible. This year is going to be different!
The final menu will only be determined once we've seen what local organic produce is available just before the event, but in principle we're going organic, vegetarian and local as far as possible. Which is fairly easy given all the great stores and markets in Gauteng. I expect the Bryanston Organic Market, Fruits and Roots, Organic Emporium and Camdeboo Farm may all play a role in our menu.
The event is next week Tuesday (5 June), so this week my task list is:
1. Get proper invites made, if possible from growing cards (you know, those ones that contain herb seeds)
2. Find organic lemons and organic tomatoes and work on organic, home-made lemonade and a great tomato sauce that we can use on the day. We're thinking about an italian menu, probably home-made pasta/pizza so tomato sauce will be a cardinal ingredient.
I need to figure out a great dessert that I can make from all or mostly organic ingredients - suggestions in the comments would be great! I have lemons and herbs in my garden (including mint) so that would be great to use. My lemon tree doesn't have enough lemons for the lemonade so I may as well use it in the dessert.
Anyway, I'll keep you posted. In the meantime, check out Yuppiechef's facebook page, they have an official invite for the event on their page with some pictures from last year's events. The picture of our friends enjoying lunch on our patio is the one on the left.
Eat for the Earth was first run last year, when we also took part. The basic concept is pretty simple: Invite some friends over on World Environment Day, get everyone to donate money, it goes to Soil for Life.
Yuppiechef sponsors some prizes for good entries, and we'd really like to be a serious contender this year. Last year we kept it fairly relaxed, hosted a Moroccan lunch which was awesome but we didn't really try to be as environmentally friendly as possible. This year is going to be different!
The final menu will only be determined once we've seen what local organic produce is available just before the event, but in principle we're going organic, vegetarian and local as far as possible. Which is fairly easy given all the great stores and markets in Gauteng. I expect the Bryanston Organic Market, Fruits and Roots, Organic Emporium and Camdeboo Farm may all play a role in our menu.
The event is next week Tuesday (5 June), so this week my task list is:
1. Get proper invites made, if possible from growing cards (you know, those ones that contain herb seeds)
2. Find organic lemons and organic tomatoes and work on organic, home-made lemonade and a great tomato sauce that we can use on the day. We're thinking about an italian menu, probably home-made pasta/pizza so tomato sauce will be a cardinal ingredient.
I need to figure out a great dessert that I can make from all or mostly organic ingredients - suggestions in the comments would be great! I have lemons and herbs in my garden (including mint) so that would be great to use. My lemon tree doesn't have enough lemons for the lemonade so I may as well use it in the dessert.
Anyway, I'll keep you posted. In the meantime, check out Yuppiechef's facebook page, they have an official invite for the event on their page with some pictures from last year's events. The picture of our friends enjoying lunch on our patio is the one on the left.
Saturday, December 10, 2011
Junipa's
The best husband in the world took me out for an early birthday celebration dinner (the actual event is on Monday, we went out Thursday night). We went to a small little bistro in Bryanston called Junipa's. And I fell in love.
They do artisan breads, roast their own coffee, and when you order a cappucino you get a cat design in the foam. I had a lovely salad with crispy duck and sour cherries, which was awesome, although the carpaccio salad with blue cheese might have been even better (I scrounged a taste from H's plate). Then a pasta Alfredo for me, pizza with slow roast lamb and olives for H, followed by chocolate brownies. Wow. Their artisan breads are made from a starter that is - get this - 8 years old.
This morning I drove past there again, and bought a sourdough loaf and some croissants, and having tasted it I'm happy to sacrifice the dream of losing weight. I'm in a little bubble of baking happiness. I can't believe this kind of food is available 10 minutes from my home and I never knew!
They do artisan breads, roast their own coffee, and when you order a cappucino you get a cat design in the foam. I had a lovely salad with crispy duck and sour cherries, which was awesome, although the carpaccio salad with blue cheese might have been even better (I scrounged a taste from H's plate). Then a pasta Alfredo for me, pizza with slow roast lamb and olives for H, followed by chocolate brownies. Wow. Their artisan breads are made from a starter that is - get this - 8 years old.
This morning I drove past there again, and bought a sourdough loaf and some croissants, and having tasted it I'm happy to sacrifice the dream of losing weight. I'm in a little bubble of baking happiness. I can't believe this kind of food is available 10 minutes from my home and I never knew!
Sunday, November 27, 2011
Apricot jam
I'm going to let you in on a little secret, one that will help you score many, many points with your friends.
Ready? Here it is: Apricot jam is UNBELIEVABLY easy to make. No, really.
In short:
1. Buy some apricots. Halve them and take out the pips.
2. Weigh them.
3. Mix with an equal weight of white sugar.
4. Let stand overnight.
5. Heat slowly until the sugar is dissolved.
6. Turn up the heat and boil until you have jam.
Voila!
If you'd like a slower walk-through, here goes:

Here I've just halved the apricots. The very first time I was involved in making apricot jam (I was a teenager, and just helped a friend's mom halve the fruit), I was told that leaving a few pips in somehow adds to the flavour; I have absolutely no idea if that's true but I've been doing it ever since.


A few extra pointers:
1. Try to use apricots that aren't fully ripe yet - something about the pectin levels in greenish apricots helps with the jam process. But they shouldn't be green in colour, just firm.
2. If you add the pips, remove them during the cooking process. It doesn't really matter all that much when, but when you're in the quick boil stage and you find a pip in your spoon, just put it aside. To be 100% sure, maybe count them as you put them in to be sure they're all out. Although you will see them in the bottling phase, unless your bottles are huge.
3. I like apricot jam to be medium thickness. A sign of a great jam is supposed to be that it's really light in colour and fine, but I like the thickness of a slightly longer boil. Just boil until it reaches your preference - if that's a deep dark colour, keep going and enjoy.
4. In terms of volume, the batch I made today was basically 2 kg of apricots and 2 kg of sugar, and I got 6.5 bottles of jam, total volume around 1.2 litres.
Ready? Here it is: Apricot jam is UNBELIEVABLY easy to make. No, really.
In short:
1. Buy some apricots. Halve them and take out the pips.
2. Weigh them.
3. Mix with an equal weight of white sugar.
4. Let stand overnight.
5. Heat slowly until the sugar is dissolved.
6. Turn up the heat and boil until you have jam.
Voila!
If you'd like a slower walk-through, here goes:
Here I've just halved the apricots. The very first time I was involved in making apricot jam (I was a teenager, and just helped a friend's mom halve the fruit), I was told that leaving a few pips in somehow adds to the flavour; I have absolutely no idea if that's true but I've been doing it ever since.
Added the sugar. My official recipe says to let it stand for a few hours, but after a few hours it still looked pretty much the same, except the sugar was a little wet. So I left it overnight the way I usually do, and this is what you get:
The sugar and apricot juice do their little hanky-panky overnight and turn into this lovely syrup. Awesome.
At this point, I lit the stove and promptly forgot about the camera, so the next few steps will have to be pictureless. Sorry.
Anyway, keep the heat really low until the sugar is dissolved. I think it will turn into toffee or something otherwise; I've never tried boiling the jam before the sugar dissolves because I don't want to waste a batch of apricot awesomeness - although if you try it, let me know what happens. This took about an hour, probably, over very low heat. I stirred it every 5-10 minutes, more frequently towards the end.
You can tell that the sugar is totally dissolved by watching the syrup on your spoon very carefully, and also running your finger through it; if you feel any grains whatsoever you have to keep going.
Once it's ready, turn up the heat. You want a steady boil but not too hectic. In this last batch my heat was a little high at one point and a droplet jumped all the way from the pot onto my arm which at that point was a good half a metre away. Ouch. Also you run the risk of it burning at the bottom if the heat is too much.
The apricots will slowly disintegrate into the sugary syrup, and the syrup will turn from a sugar syrup into a fruity jam. Keep watching what it does on the back of your spoon when you stir; for the first 20-30 minutes probably it will be just syrupy, and then you'll start to see some texture and thickness. When you think it is starting to look like jam, pour a teaspoon full onto a saucer and let it cool for 5 seconds or so. Then run your finger through it. You'll be able to tell immediately if it's too runny to spread on bread or scones - if so, keep boiling for another 5 minutes and try again.
Then when you're ready, pour into some sterilised bottles and voila! I love apricot jam.
A few extra pointers:
1. Try to use apricots that aren't fully ripe yet - something about the pectin levels in greenish apricots helps with the jam process. But they shouldn't be green in colour, just firm.
2. If you add the pips, remove them during the cooking process. It doesn't really matter all that much when, but when you're in the quick boil stage and you find a pip in your spoon, just put it aside. To be 100% sure, maybe count them as you put them in to be sure they're all out. Although you will see them in the bottling phase, unless your bottles are huge.
3. I like apricot jam to be medium thickness. A sign of a great jam is supposed to be that it's really light in colour and fine, but I like the thickness of a slightly longer boil. Just boil until it reaches your preference - if that's a deep dark colour, keep going and enjoy.
4. In terms of volume, the batch I made today was basically 2 kg of apricots and 2 kg of sugar, and I got 6.5 bottles of jam, total volume around 1.2 litres.
Friday, October 28, 2011
Tinkerbell cake
I was on leave for the last two days, to prepare for my oldest's birthday party tomorrow. Here's the cake:

The figurine on top is store-bought and not edible, but the rest of it I made myself and it's all edible. I'm pretty happy with the result.
The other side:


The figurine on top is store-bought and not edible, but the rest of it I made myself and it's all edible. I'm pretty happy with the result.
The other side:

Some of the flower detail:

It's 8pm now, 14 hours before the party starts. It's raining cats and dogs outside, so we may very well be in trouble. At least we'll have cake!
Saturday, July 16, 2011
German chocolate cake
2 weeks ago, my very good friend Lee had a birthday party and I offered to bake her a cake. She's a chocoholic and requested a chocolate-caramel-type cake, so I decided to try a German chocolate cake from this recipe book. The recipe was fairly easy, the filling was special (although VERY sweet and rich) and the end result looked quite pretty. Here goes:
Ingredients for the cake:
100 g (3.5 oz) sweet milk chocolate
Half a cup of water
2 cups flour
1 teaspoon bicarbonate of soda
pinch of salt
250 g (8.8 oz or two sticks) butter
2 cups sugar
4 eggs, separated
1 tsp vanilla essence / extract
1 cup buttermilk
Ingredients for the filling:
4 egg yolks
1 1/4 cups evaporated milk
1 1/2 teaspoon vanilla essence / extract
1 1/2 cups sugar
190 g (6.5 oz or 1 1/2 sticks) butter
2 cups dessicated coconut
1 1/2 cups pecan nuts, chopped and roasted
Ingredients for the icing:
250 g (8.8 oz or 2 sticks) butter
1 1/3 cups cocoa powder, sifted
5 cups icing sugar, sifted
2/3 cup milk
2 teaspoons vanilla essence / extract
Preheat the oven to 180 C (350 F). Grease and line 3 round 7 inch cake tins.
I'll walk you through how I did it, not just what the recipe says, which will never be exactly the same thing. So to start off, I didn't have sweet milk chocolate, only dark chocolate (52% couverture) so that's what I used.

Put the chocolate and water into a glass bowl and microwave for about 2 minutes, stirring once. You don't want the water to boil or the chocolate to melt completely, but the mixture should be warm enough that the chocolate will melt when you stir if afterwards.

In a mixing bowl, sift the flour, bicarb of soda and salt together.

At this point the recipe tells you to start beating butter and sugar and egg yolks in your electric mixer, but if you're like me and you dislike washing your mixer bowl, start by beating the egg whites until they form stiff peaks, and tip it out into a bowl. You can rinse the mixer bowl but it's probably not even necessary - and it's far easier to clean out egg whites to prepare batter than to clean out batter so you can whisk egg whites, which needs a super-clean mixing bowl.

Now measure your butter and sugar into the electric mixer.

Then, with the paddle attachment, beat the butter and sugar until light and fluffy.

Add the egg yolks, one at a time, mixing well in between. Scrape down the sides of the bowl if necessary.
Blend in the melted chocolate and vanilla essence, until has an almost chocolate-mousse like consistency:

Add the flour mixture alternately with the buttermilk, mixing well after each addition. Now mix in the whisked egg whites gently.

Pour the batter into the prepared pans and bake for 30-35 minutes. I had to bake mine a little longer - maybe 40 minutes in total. You'll know they're done when they spring back a little when you press them in the middle with the flat side of a knife or fork. When they come out of the oven, immediately run a small spatula around the edge of each layer. Cool in the pans for 15 minutes and turn out onto a wire rack.
At this point I ran into a bit of a disappointment, as the cakes didn't turn out well at all, despite the fact that I greased and lined the pans really well. It stuck to the greasing paper, which was additionally greased with butter so it really shouldn't happen:

That's the underside which should be flat - so I really don't like the actual cake recipe all that much. In retrospect I think if I make this recipe again I'll use a different recipe for the actual cake but I will use the filling and icing again - this is quite an expensive cake with the chocolate and buttermilk and all that, and while it gives a nice dense cake I think there are other ways of achieving that.
While the cake is in the oven, start preparing the filling:
Combine the egg yolks, evaporated milk and vanilla in a saucepan.

Whisk until well blended. Add the sugar and butter and cook on medium heat for 12 minutes, stirring constantly.

Remove from the heat. At this point you'll need to protect your tongue and waistline because it smells exactly like hot fudge (which it is, mostly) but it is VERY hot so succumbing to the temptation to take a spoonful might give you blisters.
If you bought roasted nuts, you can just chop them up, otherwise dry-roast them in a pan over low heat and then chop them up:

Add the coconuts and pecan nuts to the fudge filling. Mix well and cool until you can easily spread it.
For the icing:
Clean up your mixer bowl, and then mix the butter and cocoa powder until combined. Add half of the icing sugar, followed by the milk and rest of the icing sugar. Add vanilla and beat until fluffy. I didn't take pictures of this bit, sorry!
I used only about half of the icing sugar and half of the milk and it gave a nice dark not-too-sweet icing, which as it turns out was an inspired choice as the filling is REALLY sweet. In fact when we had the cake that night it was actually a bit overpoweringly rich and sweet, which was disappointing. My friend Lee did say it improved vastly by the next day so maybe this cake is best made a day or two in advance.
So, on to assembly:
Spread half of the filling on the bottom cake layer and the other half on the second, and top with the third layer. You'll have quite a high cake:

Choose the layer with the flattest bottom to go right on top, so you can ice the top as flatly as possible. Then spread the icing evenly over the sides and top. I think this goes well with very little decoration, so I just added a candle:

And here's a picture of the sliced cake, from about 5 hours later:

So what I'd do differently:
1. If I use the same cake recipe, I definitely won't use couverture chocolate. I really couldn't taste the difference that actual chocolate makes in this recipe.
2. The filling is perhaps a bit thick, so I might use less coconut so that it can spread thinner. Hanno also doesn't really like coconut, so an alternative is to use just a lot of nuts with the fudge, which would give it more crunch and it could be really lovely.
3. I'd make it a day or two in advance so all the flavours have a while to settle together.
Anyway, so there you have it! Let me know if you've tried something like this.
Ingredients for the cake:
100 g (3.5 oz) sweet milk chocolate
Half a cup of water
2 cups flour
1 teaspoon bicarbonate of soda
pinch of salt
250 g (8.8 oz or two sticks) butter
2 cups sugar
4 eggs, separated
1 tsp vanilla essence / extract
1 cup buttermilk
Ingredients for the filling:
4 egg yolks
1 1/4 cups evaporated milk
1 1/2 teaspoon vanilla essence / extract
1 1/2 cups sugar
190 g (6.5 oz or 1 1/2 sticks) butter
2 cups dessicated coconut
1 1/2 cups pecan nuts, chopped and roasted
Ingredients for the icing:
250 g (8.8 oz or 2 sticks) butter
1 1/3 cups cocoa powder, sifted
5 cups icing sugar, sifted
2/3 cup milk
2 teaspoons vanilla essence / extract
Preheat the oven to 180 C (350 F). Grease and line 3 round 7 inch cake tins.
I'll walk you through how I did it, not just what the recipe says, which will never be exactly the same thing. So to start off, I didn't have sweet milk chocolate, only dark chocolate (52% couverture) so that's what I used.

Put the chocolate and water into a glass bowl and microwave for about 2 minutes, stirring once. You don't want the water to boil or the chocolate to melt completely, but the mixture should be warm enough that the chocolate will melt when you stir if afterwards.

In a mixing bowl, sift the flour, bicarb of soda and salt together.

At this point the recipe tells you to start beating butter and sugar and egg yolks in your electric mixer, but if you're like me and you dislike washing your mixer bowl, start by beating the egg whites until they form stiff peaks, and tip it out into a bowl. You can rinse the mixer bowl but it's probably not even necessary - and it's far easier to clean out egg whites to prepare batter than to clean out batter so you can whisk egg whites, which needs a super-clean mixing bowl.

Now measure your butter and sugar into the electric mixer.

Then, with the paddle attachment, beat the butter and sugar until light and fluffy.

Add the egg yolks, one at a time, mixing well in between. Scrape down the sides of the bowl if necessary.
Blend in the melted chocolate and vanilla essence, until has an almost chocolate-mousse like consistency:

Add the flour mixture alternately with the buttermilk, mixing well after each addition. Now mix in the whisked egg whites gently.

Pour the batter into the prepared pans and bake for 30-35 minutes. I had to bake mine a little longer - maybe 40 minutes in total. You'll know they're done when they spring back a little when you press them in the middle with the flat side of a knife or fork. When they come out of the oven, immediately run a small spatula around the edge of each layer. Cool in the pans for 15 minutes and turn out onto a wire rack.
At this point I ran into a bit of a disappointment, as the cakes didn't turn out well at all, despite the fact that I greased and lined the pans really well. It stuck to the greasing paper, which was additionally greased with butter so it really shouldn't happen:

That's the underside which should be flat - so I really don't like the actual cake recipe all that much. In retrospect I think if I make this recipe again I'll use a different recipe for the actual cake but I will use the filling and icing again - this is quite an expensive cake with the chocolate and buttermilk and all that, and while it gives a nice dense cake I think there are other ways of achieving that.
While the cake is in the oven, start preparing the filling:
Combine the egg yolks, evaporated milk and vanilla in a saucepan.

Whisk until well blended. Add the sugar and butter and cook on medium heat for 12 minutes, stirring constantly.

Remove from the heat. At this point you'll need to protect your tongue and waistline because it smells exactly like hot fudge (which it is, mostly) but it is VERY hot so succumbing to the temptation to take a spoonful might give you blisters.
If you bought roasted nuts, you can just chop them up, otherwise dry-roast them in a pan over low heat and then chop them up:

Add the coconuts and pecan nuts to the fudge filling. Mix well and cool until you can easily spread it.
For the icing:
Clean up your mixer bowl, and then mix the butter and cocoa powder until combined. Add half of the icing sugar, followed by the milk and rest of the icing sugar. Add vanilla and beat until fluffy. I didn't take pictures of this bit, sorry!
I used only about half of the icing sugar and half of the milk and it gave a nice dark not-too-sweet icing, which as it turns out was an inspired choice as the filling is REALLY sweet. In fact when we had the cake that night it was actually a bit overpoweringly rich and sweet, which was disappointing. My friend Lee did say it improved vastly by the next day so maybe this cake is best made a day or two in advance.
So, on to assembly:
Spread half of the filling on the bottom cake layer and the other half on the second, and top with the third layer. You'll have quite a high cake:

Choose the layer with the flattest bottom to go right on top, so you can ice the top as flatly as possible. Then spread the icing evenly over the sides and top. I think this goes well with very little decoration, so I just added a candle:

And here's a picture of the sliced cake, from about 5 hours later:

So what I'd do differently:
1. If I use the same cake recipe, I definitely won't use couverture chocolate. I really couldn't taste the difference that actual chocolate makes in this recipe.
2. The filling is perhaps a bit thick, so I might use less coconut so that it can spread thinner. Hanno also doesn't really like coconut, so an alternative is to use just a lot of nuts with the fudge, which would give it more crunch and it could be really lovely.
3. I'd make it a day or two in advance so all the flavours have a while to settle together.
Anyway, so there you have it! Let me know if you've tried something like this.
Wednesday, June 22, 2011
In lieu of date night...
I'm making a quiche. Supposedly vegetarian but that doesn't apply anymore once you add some chargrilled ham to it, I suppose.
Here's the recipe:
Chop up some mixed veg (I usually use spinach, butternut, mushrooms, peppers and leeks. Tonight I don't have spinach so I substituted some extra mushrooms). Put it in a pot with about a tablespoon of olive oil and a splash of soy sauce. Steam for about 12-15 minutes until the butternut goes soft. Stir now and then. Oh, and add about 10 basil leaves before you put it on the stove, it makes quite a difference.
Then mix 4 eggs with about 150 mls of coconut milk (I used normal milk tonight, it's less WW points). Once the veggies are going soft, put them in an oven-proof dish. Pour over the eggy mixture. If you want to spoil the vegetarian status of the quiche, now is the time to poke some pieces of ham in between the veggies. Then crumble some feta over the top, and parmesan if you want, and bake at 160 degrees for about 20 minutes or until the eggs are set. Yum!
So baby's in bed, the older one is bathed and pj'ed, playing next to me on the floor. Hanno is reading a book on the Kindle in front of the fire. Dinner will be done in about 15 minutes. Who needs date night to have a great evening?
Here's the recipe:
Chop up some mixed veg (I usually use spinach, butternut, mushrooms, peppers and leeks. Tonight I don't have spinach so I substituted some extra mushrooms). Put it in a pot with about a tablespoon of olive oil and a splash of soy sauce. Steam for about 12-15 minutes until the butternut goes soft. Stir now and then. Oh, and add about 10 basil leaves before you put it on the stove, it makes quite a difference.
Then mix 4 eggs with about 150 mls of coconut milk (I used normal milk tonight, it's less WW points). Once the veggies are going soft, put them in an oven-proof dish. Pour over the eggy mixture. If you want to spoil the vegetarian status of the quiche, now is the time to poke some pieces of ham in between the veggies. Then crumble some feta over the top, and parmesan if you want, and bake at 160 degrees for about 20 minutes or until the eggs are set. Yum!
So baby's in bed, the older one is bathed and pj'ed, playing next to me on the floor. Hanno is reading a book on the Kindle in front of the fire. Dinner will be done in about 15 minutes. Who needs date night to have a great evening?
Subscribe to:
Posts (Atom)